Perfectly Fluffy Homemade Panettone: No Mixer Needed (VIDEO)

Follow this step-by-step guide to make the ultimate fluffy homemade Panettone bread without a mixer. Master the dough techniques for delicious results.
Get ready to create a perfectly fluffy homemade panettone without a mixer! You might think this classic Italian Christmas bread is too complicated to make at home, but I’m here to prove you wrong. With just a few simple ingredients and some good old-fashioned elbow grease, you’ll be amazed at what you can achieve. Follow along as I guide you through each step of the process, from creating the initial biga to forming the final dough. You’ll soon be impressing friends and family with your very own homemade panettone that rivals any store-bought version.
What is Panettone and Why is it a Christmas Tradition?
The Origins of Panettone
Panettone is a sweet bread loaf originating from Milan, Italy. This dome-shaped delicacy is studded with candied fruits and raisins, giving it a distinctive flavor and appearance. The homemade panettone you’re about to create carries on a centuries-old tradition that dates back to the Renaissance.
A Symbol of Christmas
You’ll find panettone at the heart of Italian Christmas celebrations. Its rich history and symbolic meaning make it more than just a dessert. As you craft your easy Panettone recipe, you’re participating in a cherished holiday custom that brings families together.
The Art of Panettone-Making
Creating this festive bread is an art form. While commercial versions are widely available, nothing compares to the satisfaction of baking your own. Your homemade panettone will have a lighter, fluffier texture and a more complex flavor profile than store-bought varieties.
A Global Favorite
Though Italian in origin, panettone bread has become a beloved Christmas treat worldwide. You’ll find variations of this bread in many countries, each adding its own unique twist. By mastering this recipe, you’re joining a global community of panettone enthusiasts who appreciate the craft of artisanal baking.
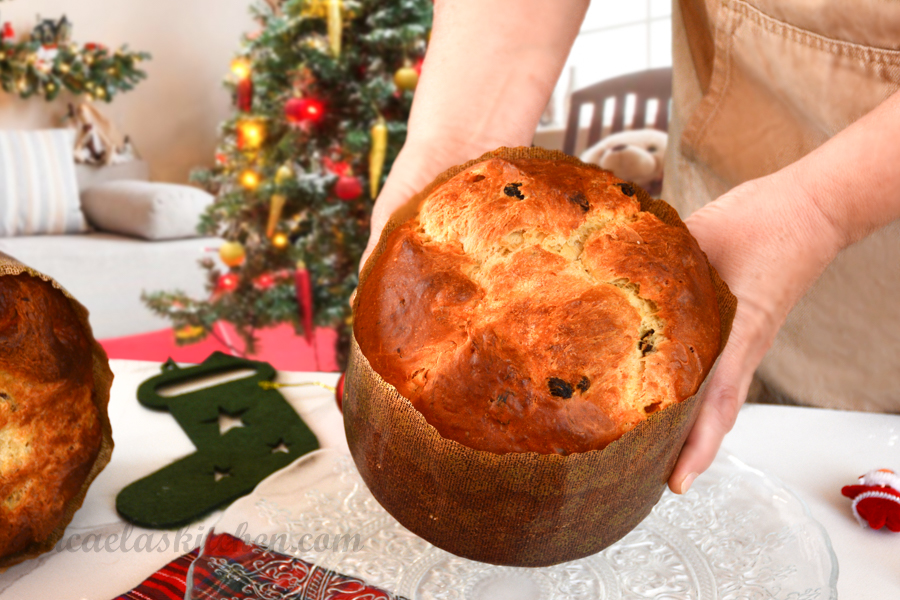
The Secret to Perfectly Fluffy Homemade Panettone
Master the Dough-Making Process
Creating a perfectly fluffy homemade panettone starts with mastering the dough. You’ll need to prepare three separate doughs, each contributing to the bread’s signature texture. Begin with the Biga, a pre-ferment that adds depth of flavor. Next, create the second dough, which builds on the Biga’s foundation. Finally, craft the third dough, incorporating rich ingredients like eggs, butter, and fruits.
Patience is Key
The secret to achieving that light, airy texture in your easy Panettone recipe lies in allowing ample time for fermentation and rising. Each stage requires specific resting periods, some at room temperature and others in the refrigerator. This slow process develops complex flavors and creates the delicate, honeycomb-like structure that panettone is famous for.
Perfect Your Kneading Technique
Without a stand mixer, you’ll need to rely on your hands to develop the gluten in your homemade panettone. Use a gentle folding and stretching motion rather than aggressive kneading. This technique incorporates air into the dough while creating a strong gluten network. As you work the dough, you’ll feel it becoming smoother and more elastic – that’s when you know you’re on the right track to panettone perfection.
Ingredients and Tools Needed for Easy Panettone Recipe
To make this homemade panettone, you’ll need a mix of pantry staples and specialty items. For the dough, gather high-quality flour, fresh yeast, sugar, eggs, butter, and milk. Don’t forget the flavoring agents: vanilla pod, lemon zest, and a pinch of salt. The star ingredients that give panettone its signature taste are candied orange, candied citron, and raisins. Make sure to soak your raisins beforehand for the best texture.
For a Panettone mold of about 750g, you will need:
1st dough or Biga:
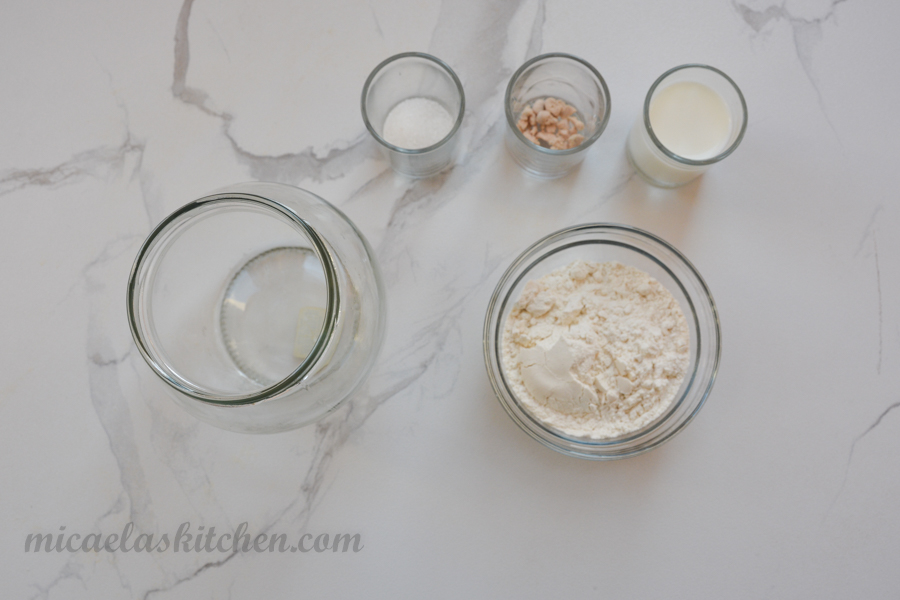
- 3 g fresh yeast (1 tsp)
- 1 teaspoon sugar, malt or honey (1 tsp)
- 30 g whole milk, at room temperature (1 oz)
- 50 g flour 0 (1 cup plus 2 tbsp)
2nd dough:
- 135 g flour 0 (1 cup plus 2 tbsp)
- 85 g eggs (about 1 1/2 medium egg) (3 oz)
- 6 g fresh yeast (2 tsp)
- 40 g granulated sugar (3 tbsp plus 1 tsp)
- 45 g butter, softened at room temperature (¼ stick plus 1 tbsp)
3rd dough:
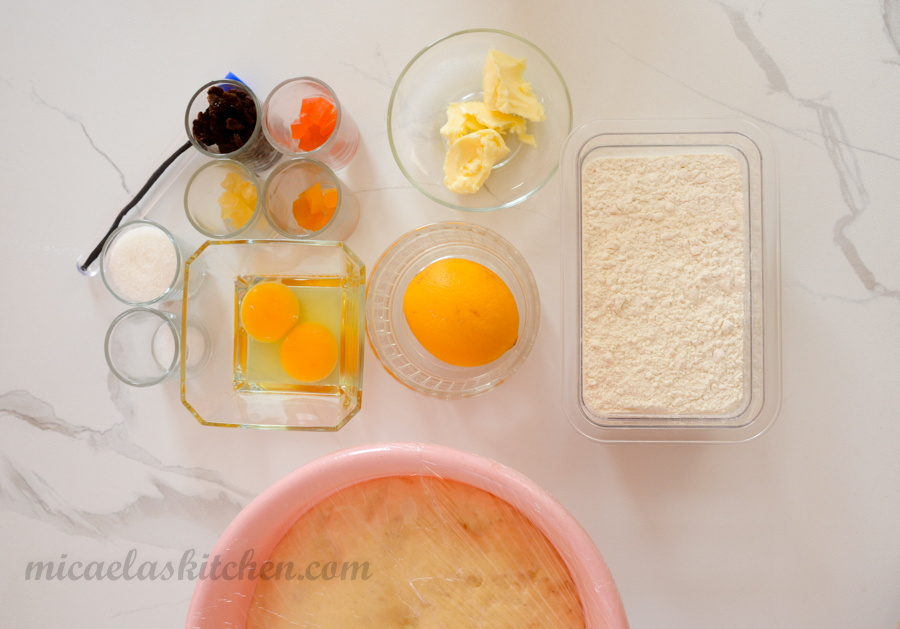
- 200 g flour 0 (1 cup plus 2 tbsp)
- 53 g egg (about 1 medium egg) (1 ¾ oz)
- 30 g egg yolks (about 2 egg yolks) (1 oz)
- 50 g granulated sugar (¼ cup)
- 3 g salt (1 tsp)
- 1 grated lemon zest
- 45 g butter, softened at room temperature (¼ stick plus 1 tbsp) + a knob of butter (2 tablespoons butter)
- 1 vanilla pod
- 20 g candied orange, cut into cubes (¾ oz)
- 20 g candied citron, cut into cubes (¾ oz)
- 60 g raisins, soaked and squeezed (⅓ cup plus 1 tbsp)
Essential Tools for Success
While this easy Panettone recipe doesn’t require a stand mixer, you’ll still need a few key tools. A large mixing bowl is crucial for combining ingredients and kneading the dough by hand. You’ll also want to have a good kitchen scale for precise measurements, especially when working with yeast. A 750g panettone paper mold is essential for achieving that classic dome shape.
Prep Work for a Smooth Baking Process
Before diving into this homemade panettone adventure, prep your workspace. Measure out all ingredients in advance, ensuring everything is at room temperature. Soften your butter and soak the raisins ahead of time. Having everything ready will make the multi-stage dough process much more manageable. Remember, patience is key when making panettone, so set aside enough time to let each dough stage rise properly.
Step-by-Step Guide to Making Homemade Panettone Without a Mixer
Creating a delicious homemade panettone doesn’t require fancy equipment. Follow this easy Panettone recipe to achieve a perfectly fluffy dough using just your hands and a bit of patience.
Prepare the Biga
Start by mixing the first dough, or Biga. Combine fresh crumbled yeast, sugar, milk, and flour in a bowl. Knead until smooth, then cover the bowl with a kitchen towel or plastic wrap and let it rise for 1 hour at room temperature and then 12 hours in the refrigerator.
Mix the Second Dough
Once the resting time has elapsed, add the flour onto your work surface and use your hands to make a crater in the center. Add eggs, the crumbled yeast and the sugar. With a spatula, move the flour from the edges of the crater towards the center, onto the other ingredients, to let it absorb a little, then add the Biga. Still helping yourself with the spatula, start mixing the ingredients, always collecting the flour from the edges. Add the butter, then knead until smooth.
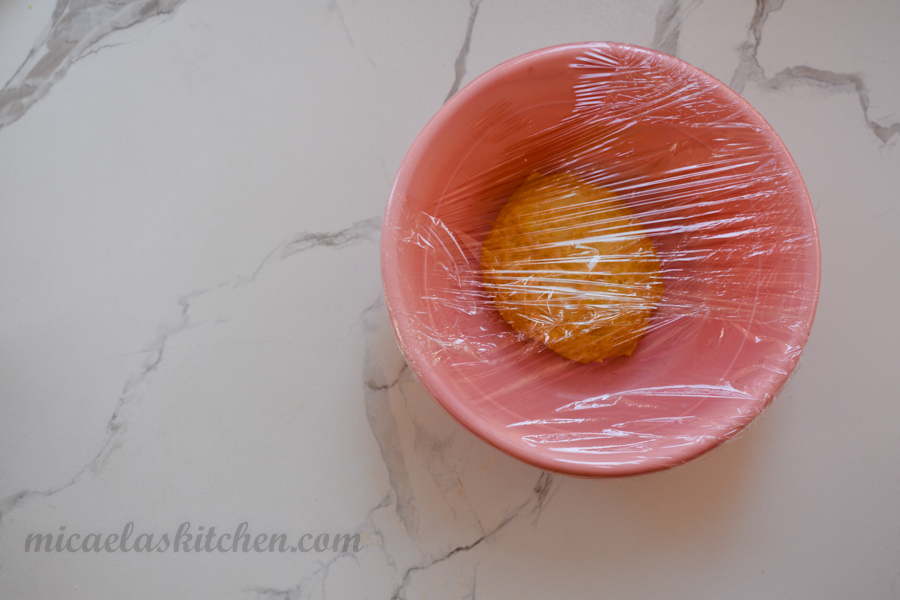
Spread it with your hands and fold it on itself, then turn it clockwise and repeat the folding. Do the same thing two more times, then make a ball, put it into a bowl covered with cling film and let it rise for 1 hour at 26-28° then for 12 hours in the fridge, then for 2 hours at 26-28° C.
PRO TIP – To obtain 26-28°C, place a saucepan of hot water in the oven, put the dough inside and close the oven.
Combine the Final Dough
After the resting time of the 2nd dough, put the flour on your work surface and use your hands to make a crater in the center. Add eggs and with a spatula move the flour from the edges of the crater towards the center, onto the other ingredients, to let it absorb a little, then add the 2nd dough. Add sugar, salt, and lemon zest. Knead until the dough comes together.
Add the room temperature butter a little at a time. Before adding more butter, make sure the previous one is fully incorporated. Knead until the dough comes together. Open the vanilla pod in the center with a knife lengthwise and scrape out all the vanilla seeds, adding them to the mixture. Add the candied fruit and raisins and quickly incorporate.
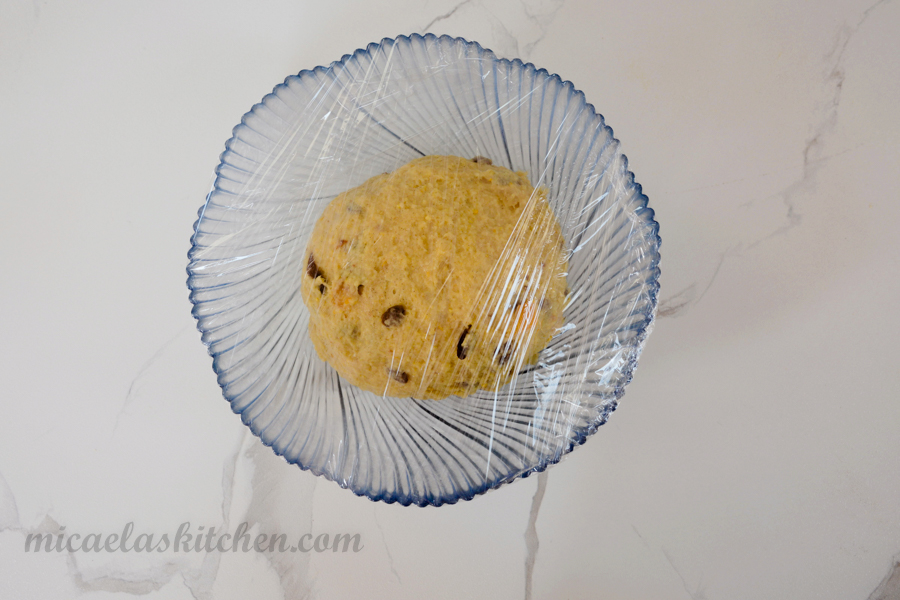
Wet your hands. Spread it with your hands and fold it on itself, then turn it clockwise and repeat the folding. Do the same thing two more times, then make a ball, place it in a bowl covered with cling film and let it rise for 2 1/2 hours.
Shape and Bake
Once the time has passed, transfer the dough to the work surface. Spread it with your hands and fold it on itself, then turn it clockwise and repeat the folding. Do the same thing two more times, then make a ball, put it in the mold and let it rise for 5 hours, or until it rises to 2 cm below the edge of the mold. At this point let the dough rest for 3 minutes in the air to form a crust on top. With a sharp knife, cut a cross on the surface of the panettone and add a knob of butter in the center.
Place in a preheated static oven at 175° for 50 minutes. After 5 minutes, place a baking tray on the top shelf of the oven to prevent the panettone from burning.
NOTE – I used a gas oven for cooking, if you use an electric oven you have to reduce the temperature and cooking times by about 10%.
Remove your panettone from the oven when you see that it is golden brown on the surface. If you are unsure whether it is cooked to perfection, use a long toothpick, one of those used for a skewer, and delicately skewer the panettone; if it comes out dry, when you remove it, the panettone is cooked.
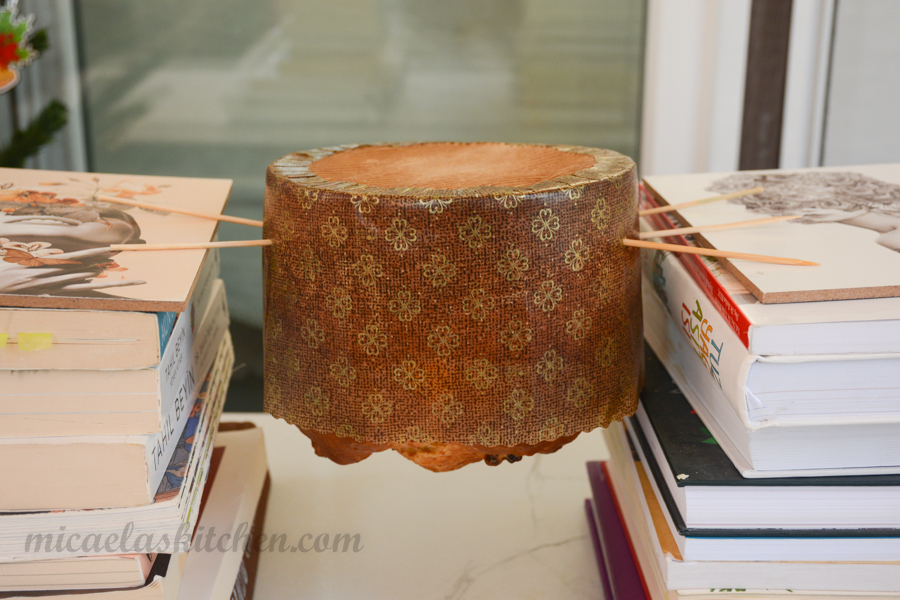
Thread the panettone with skewers and turn it over. Let it cool for 6 hours upside down.
Now you can enjoy your homemade panettone!
Making Panettone at Home: The Video Tutorial
Tips for a Perfect Homemade Panettone
To elevate your homemade panettone, try these tricks:
- Soak the raisins in rum or orange juice for extra flavor
- Add a teaspoon of orange blossom water to the dough for a subtle floral note
- Brush the top with egg wash before baking for a golden, shiny crust
Serving and Storage Suggestions
Serve your panettone at room temperature for the best texture. Slice it vertically for even portions. Pair it with sweet wine like Moscato d’Asti or a creamy cappuccino for a true Italian experience.
To store, wrap tightly in plastic wrap and keep at room temperature for up to a week. For longer storage, freeze for up to three months. Thaw overnight before serving to enjoy your homemade panettone’s fluffy texture any time of year.
Perfectly Fluffy Homemade Panettone: No Mixer Needed
Equipment
- 1 750g Panettone paper mold
Ingredients
1st dough or Biga:
- 3 g fresh yeast
- 1 teaspoon sugar malt or honey
- 30 g whole milk at room temperature
- 50 g flour 0
2nd dough:
- 135 g flour 0
- 85 g eggs
- 6 g fresh yeast
- 40 g granulated sugar
- 45 g butter softened at room temperature
3rd dough:
- 200 g flour 0
- 53 g eggs
- 30 g egg yolks
- 50 g granulated sugar
- 3 g salt
- 1 grated lemon zest
- 45 g butter softened at room temperature + a knob of butter
- 1 vanilla pod
- 20 g candied orange cut into cubes
- 20 g candied citron cut into cubes
- 60 g raisins soaked and squeezed
Instructions
1st dough or Biga:
- In a large bowl mix crumbled yeast, sugar, milk, and flour, until you obtain a smooth dough.
- Cover with cling film and allow to rise for 1 hour at room temperature and then 12 hours in the refrigerator.
2nd dough:
- Once the resting time has elapsed, put the flour on your work surface and use your hands to make a crater in the center.
- Add eggs, the crumbled yeast and the sugar. With a spatula, move the flour from the edges of the crater towards the center, onto the other ingredients, to let it absorb a little, then add the Biga. Still helping yourself with the spatula, start mixing the ingredients, always collecting the flour from the edges.
- Add the butter, then knead until smooth.
- Spread it with your hands and fold it on itself, then turn it clockwise and repeat the folding. Do the same thing two more times, then make a ball, put it into a bowl covered with cling film and let it rise for 1 hour at 26-28° then for 12 hours in the fridge, then for 2 hours at 26-28° C. To obtain 26-28°C, place a saucepan of hot water in the oven, put the dough inside and close the oven.
3rd dough:
- After the resting time of the 2nd dough, put the flour on your work surface and use your hands to make a crater in the center.
- Add eggs and with a spatula move the flour from the edges of the crater towards the center, onto the other ingredients, to let it absorb a little, then add the 2nd dough.
- Add sugar, salt, and lemon zest. Knead until the dough comes together.
- Add the room temperature butter a little at a time. Before adding more butter, make sure the previous one is fully incorporated. Knead until the dough comes together.
- Open the vanilla pod in the center with a knife lengthwise and scrape out all the vanilla seeds, adding them to the mixture.
- Add the candied fruit and raisins and quickly incorporate.
- Wet your hands. Spread it with your hands and fold it on itself, then turn it clockwise and repeat the folding. Do the same thing two more times, then make a ball, place it in a bowl covered with cling film and let it rise for 2 1/2 hours.
- Once the time has passed, transfer the dough to the work surface. Spread it with your hands and fold it on itself, then turn it clockwise and repeat the folding. Do the same thing two more times, then make a ball, put it in the mold and let it rise for 5 hours, or until it rises to 2 cm below the edge of the mold. At this point let the dough rest for 3 minutes in the air to form a crust on top.
- With a sharp knife, cut a cross on the surface of the panettone and add a knob of butter in the center.
Cooking:
- Place in a preheated static oven at 175° for 50 minutes. After 5 minutes, place a baking tray on the top shelf of the oven to prevent the panettone from burning. (I used a gas oven for cooking, if you use an electric oven you have to reduce the temperature and cooking times by about 10%).
- Remove your panettone from the oven when you see that it is golden brown on the surface. If you are unsure whether it is cooked to perfection, use a long toothpick, one of those used for a skewer, and delicately skewer the panettone; if it comes out dry, when you remove it, the panettone is cooked.
- Thread the panettone with skewers and turn it over. Let it cool for 6 hours upside down.


