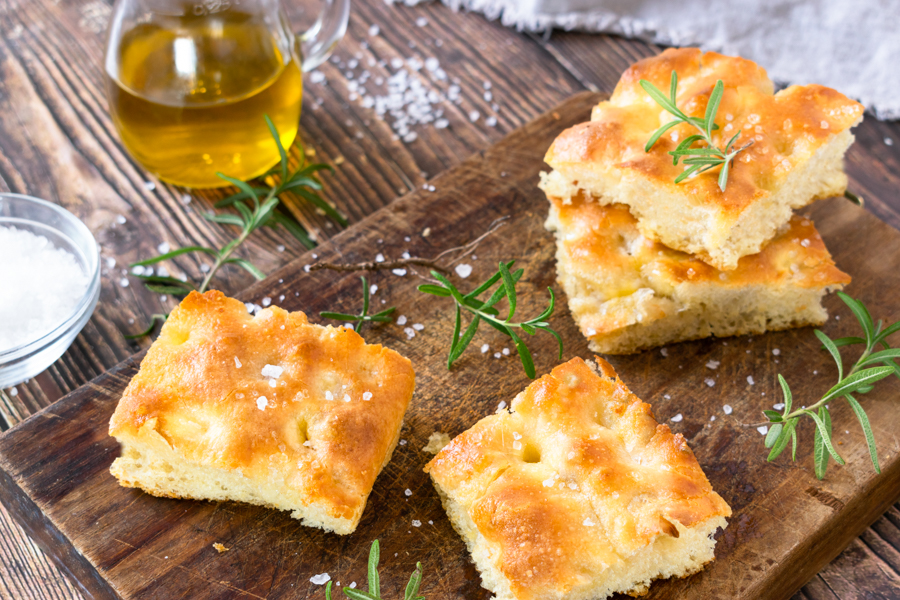
Learn how to make authentic Genoese Focaccia Flatbread with a crackly crust, fluffy interior, and olive oil-herb flavor straight from Italy.
Get ready to master the art of authentic Genoese focaccia, a flatbread that’s as rich in history as it is in flavor. In this tutorial, you’ll discover the secrets behind creating this golden, dimpled delight that’s become a staple of Italian cuisine. From selecting the perfect flour to mastering the unique salamoia technique, you’ll learn step-by-step how to craft a focaccia that’s crispy on the outside, soft on the inside, and bursting with the essence of Italian tradition. So roll up your sleeves, preheat your oven, and let’s dive into the world of Genoese focaccia!
What Makes Genoese Focaccia So Special?
A Unique Texture and Flavor Profile
Genoese focaccia stands out from other flatbreads due to its distinctive characteristics. The hallmark of this Ligurian delicacy is its thin, golden-brown crust that’s simultaneously crispy and chewy. When you bite into it, you’ll experience a perfect balance of textures — a slight crunch on the outside giving way to a soft, airy interior.
What truly sets Genoese focaccia apart is its signature brine coating. Before the final rise, the dough is generously brushed with a mixture of water, salt, and extra virgin olive oil. This unique step not only enhances the flavor but also contributes to the bread’s irresistible golden hue and moist texture.
Versatility in Consumption
One of the most charming aspects of Genoese focaccia is its versatility. In Liguria, it’s enjoyed throughout the day — from breakfast to late-night snacks. You can savor it plain, dip it in your morning cappuccino (a local tradition!), or use it as a base for sandwiches. Its adaptability makes it a perfect companion for any meal or occasion.
A Labor of Love
The preparation of authentic Genoese focaccia is a testament to the art of bread-making. The process, while not overly complex, requires patience and attention to detail. Multiple rising periods allow the dough to develop its characteristic flavor and texture. The careful dimpling of the surface before baking ensures even distribution of the flavorful olive oil and creates those iconic indentations that make Genoese focaccia instantly recognizable.
Traditional Focaccia Genovese History
Origins in Liguria
Focaccia Genovese, a beloved Italian flatbread, has its roots deeply embedded in the culinary traditions of Liguria, particularly in the port city of Genoa. This iconic bread has been a staple of Ligurian cuisine for centuries, with its origins dating back to the ancient Romans. The word “focaccia” itself is derived from the Latin “focus,” meaning hearth, highlighting its humble beginnings as a simple flatbread baked in the ashes of the fireplace.
Evolution and Cultural Significance
Over time, focaccia evolved from a basic flatbread to the olive oil-rich, salt-sprinkled delicacy we know today. In Genoa, it became more than just food – it’s a cultural icon. Traditionally, Genoese bakers would use focaccia to test the temperature of their wood-fired ovens before baking bread. This practice led to the development of the thin, crispy-yet-soft texture that’s now synonymous with authentic Focaccia Genovese.
Modern-Day Popularity
Today, Focaccia Genovese has gained worldwide recognition. Its versatility has made it a favorite not just in Italy, but across the globe. You’ll find it served as a snack, appetizer, or even as a meal itself. The unique preparation method, involving a brine (salamoia) that’s poured over the dough before baking, gives it its characteristic golden color and flavor. As you embark on making your own Focaccia Genovese, remember, you’re not just baking bread — you’re participating in a rich culinary tradition that spans millennia.
Genoese Focaccia Flatbread Ingredients
- Manitoba flour – Craving that perfect Italian focaccia? Look no further this Manitoba Flour. This isn’t your average all-purpose flour—it’s a high-protein powerhouse that’ll transform your bread game. Hailing from the heart of Italy, this flour is the secret weapon behind those airy, chewy focaccia loaves you’ve been dreaming about. But don’t stop there—its versatility shines in everything from pillowy pizza crusts to golden panettone. With its superior gluten development, your doughs will rise to new heights (literally) and achieve that coveted open crumb structure. Whether you’re a seasoned baker or just dipping your toes in the flour bin, this Manitoba flour brings a taste of Italian tradition to your kitchen.
- 0 flour
- Fresh brewer’s yeast or Dry brewer’s yeast
- Water
- Honey
- Extra virgin olive oil
- Sea salt
- Coarse salt
How can I replace Manitoba flour, if I can’t find it?
If you’re unable to find Manitoba flour for making Italian focaccia bread, you can substitute it with bread flour. Bread flour has a higher protein content similar to Manitoba flour, which helps create a chewy and airy texture in bread. When replacing Manitoba flour with bread flour, use it in the same quantity as mentioned in the recipe. This substitution should work well in your focaccia bread recipe, providing a similar result in terms of texture and structure.
Genoese Focaccia Video Recipe
Mastering the Genoese Focaccia Flatbread Recipe: Step-by-Step Instructions
1. Prepare the starter (Biga).
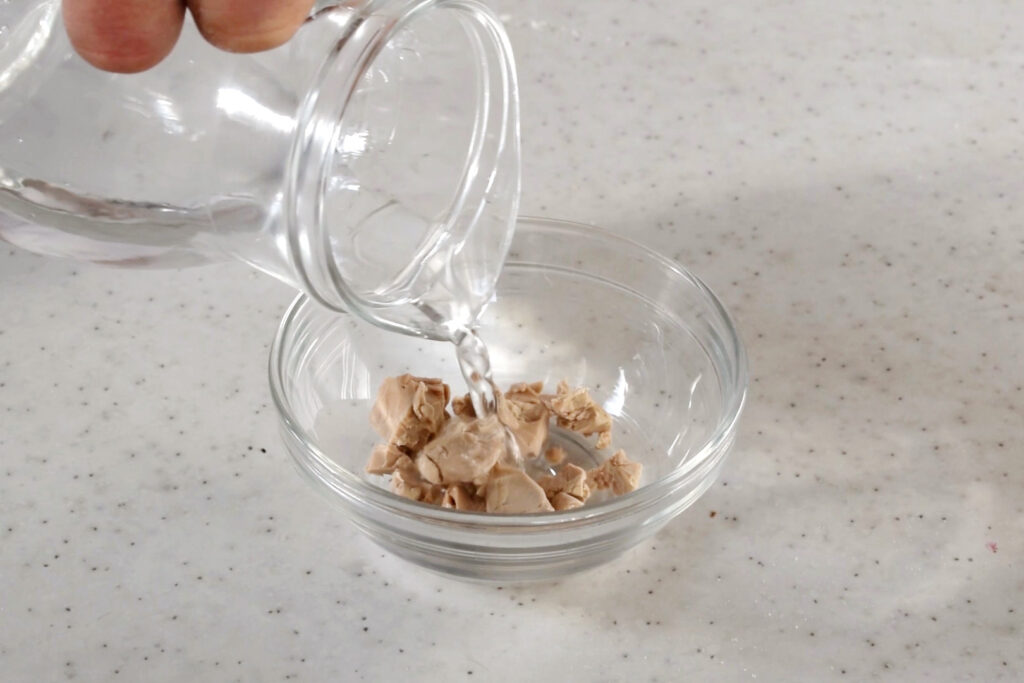
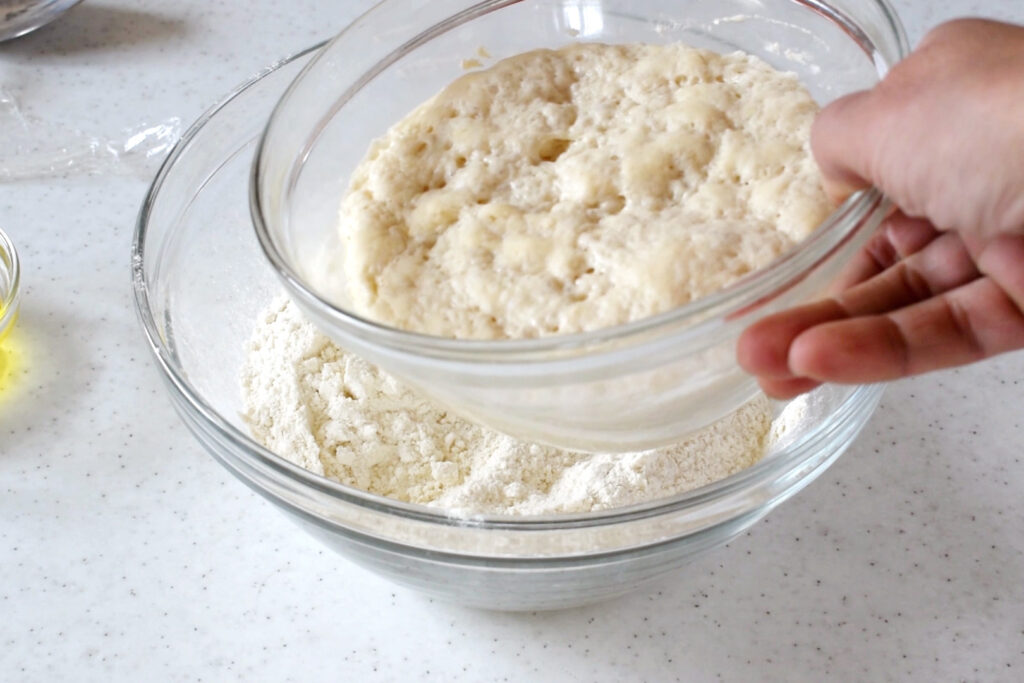
In a large bowl, mix the two flours and sift them. In a smaller bowl, add 100 g of flour taken from the sifted flour mixture, and the yeast dissolved in 60 ml of water taken from the total (1). Knead by hand, form a ball and make an incision of a cross (2). Cover with plastic wrap and let rise at 26°C (78 °F) for about 1-2 hours, until the starter has doubled in volume. To reach about 26° C you can put the dough in the oven turned off, closing the door.

2. Prepare the dough.
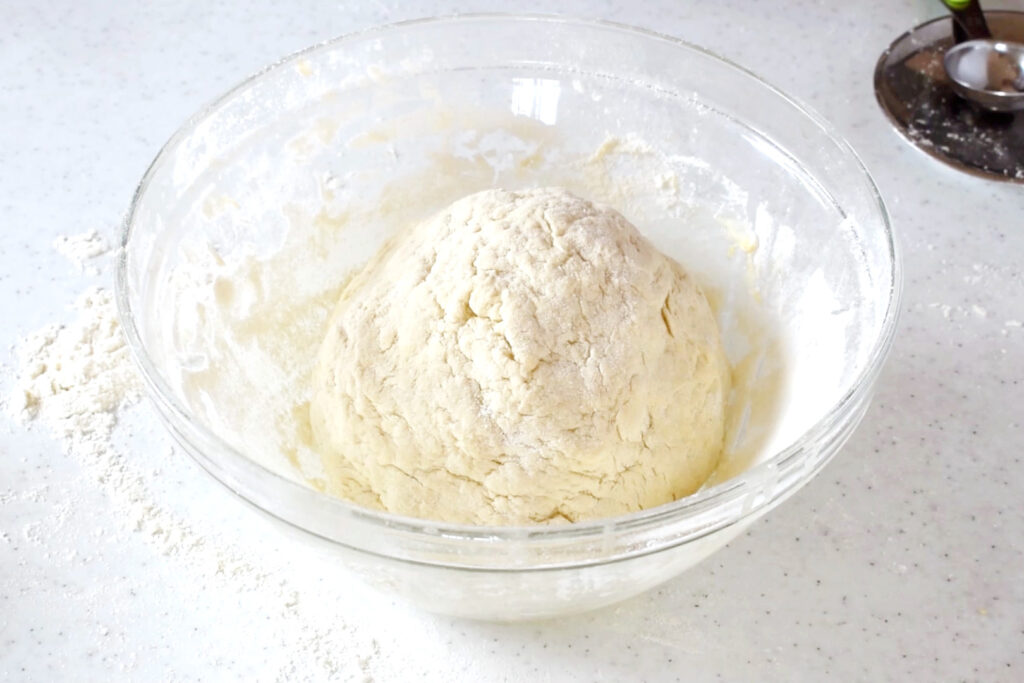
In the large bowl with the flours, add the starter (3), 240 ml of water and a teaspoon of honey. Knead until all the ingredients are incorporated, it will only take a few minutes. Put the dough on a lightly floured work surface. Then add 30 g of oil, a little at a time, and knead. It will take 5 minutes, and you will see the dough of the Genoese focaccia become elastic and detach from the walls. Finally, add the salt and knead well. Form a ball and put it back in the bowl (4). Cover with plastic wrap and let rise for at least 3 hours at 26°C (78 °F). The dough must triple in volume (5). In winter, it will take 4 hours, in summer 2-3 hours will be enough.

3. At this point you can break the rising and proceed in various ways:
- Freeze all or part of the dough: It may happen that there are few people for dinner, you want to store the dough or part of it for parties and buffets. Turn the dough onto a lightly floured work surface, seal the whole dough or divide it into 350g balls. Seal in airtight containers or in special freezer bags. You can then thaw in the fridge naturally. Leave at room temperature, sealed with plastic wrap, until it reaches room temperature and then proceed as step 5.
- Extend rising in the fridge: It is possible, especially if you want an even more digestible Genoese focaccia. In this case you can also use only 5g of fresh yeast and leave the dough in the fridge from a minimum of one night to a maximum of 72 hours. When you have decided to use the dough, leave it at room temperature sealed with plastic wrap until it reaches room temperature and then proceed as below.
4. Prepare the salamoia (brine).
In a pitcher put the water, salt and oil. Stir well until the salt dissolves. It seems like a lot of brine, and the first thing that comes to mind is: I’ll use less! Trust me! the amounts are right! At the end of the time, the focaccia dough will have taken on a puffy and rested appearance.
5. Prepare the Genoese focaccia in a baking sheet.
Turn the risen dough onto a lightly floured work surface, form a ball, and let it rest for 10 minutes.
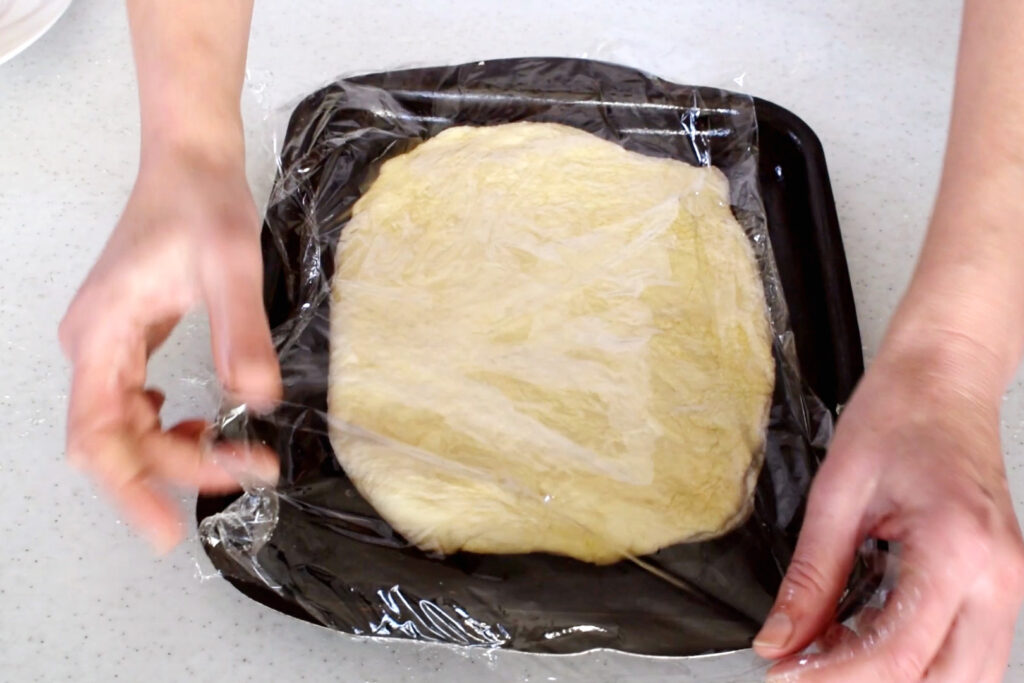
Roll out the dough dusted lightly with Manitoba flour. Transfer the rolled out dough to an oiled baking sheet (about cm 40×30 or 16×12 inch baking sheet). Cover with plastic wrap (6) and let rise for about 40 minutes (7).
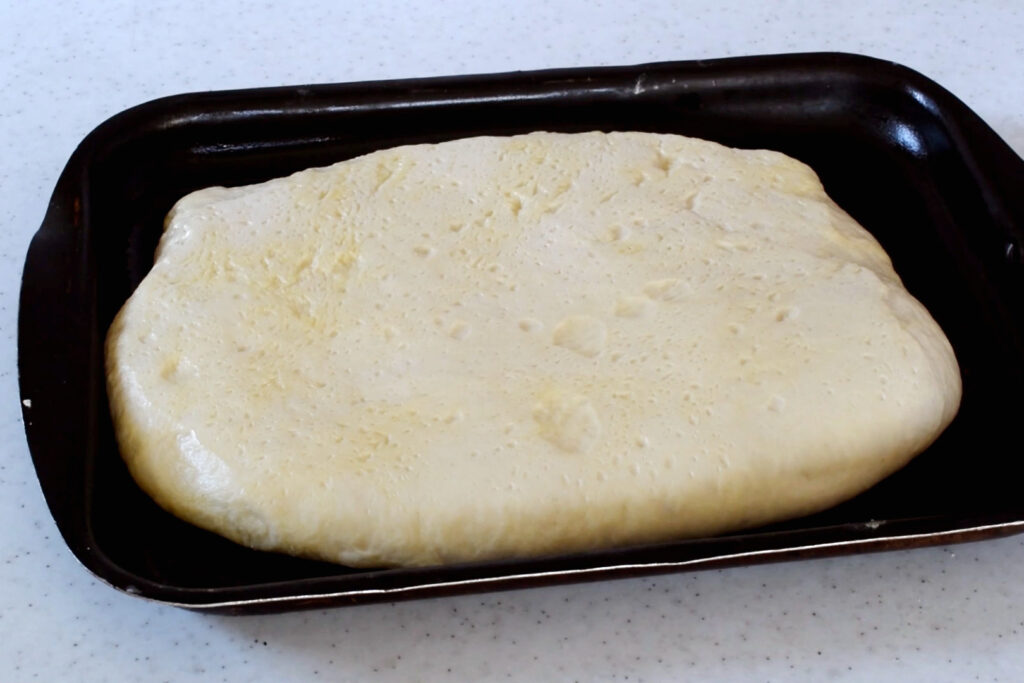
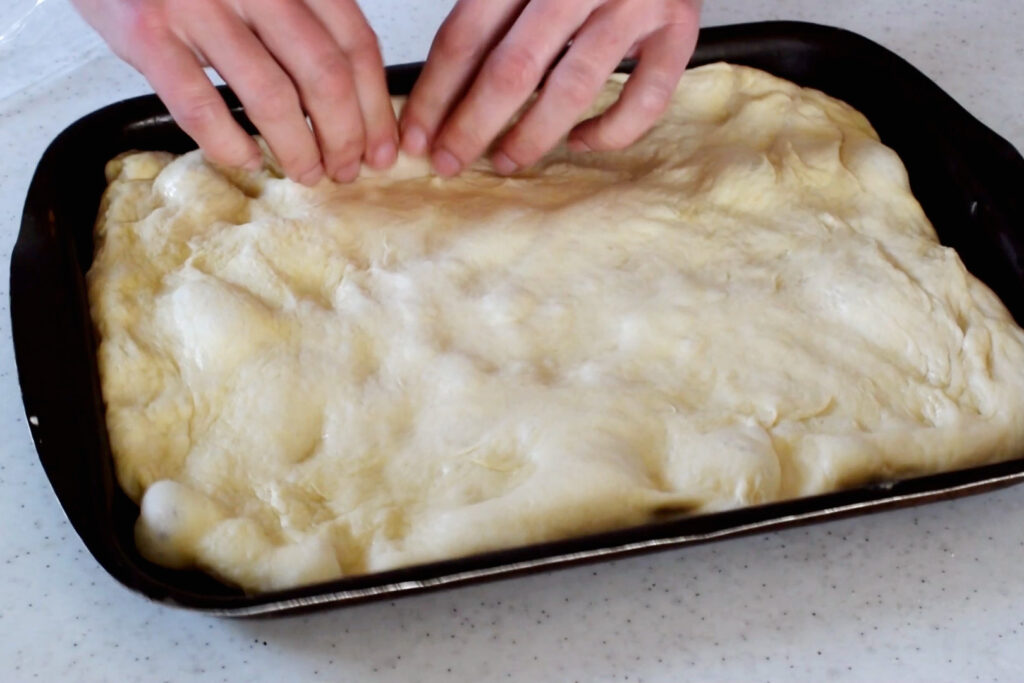
At the end of the indicated time, stretch the Genoese focaccia edges until they reach the edges of the pan (8). Cover with plastic wrap and let rise for 1 hour. At the end of the time, the focaccia dough will have taken on a puffy and rested appearance. It’s time to make the holes!
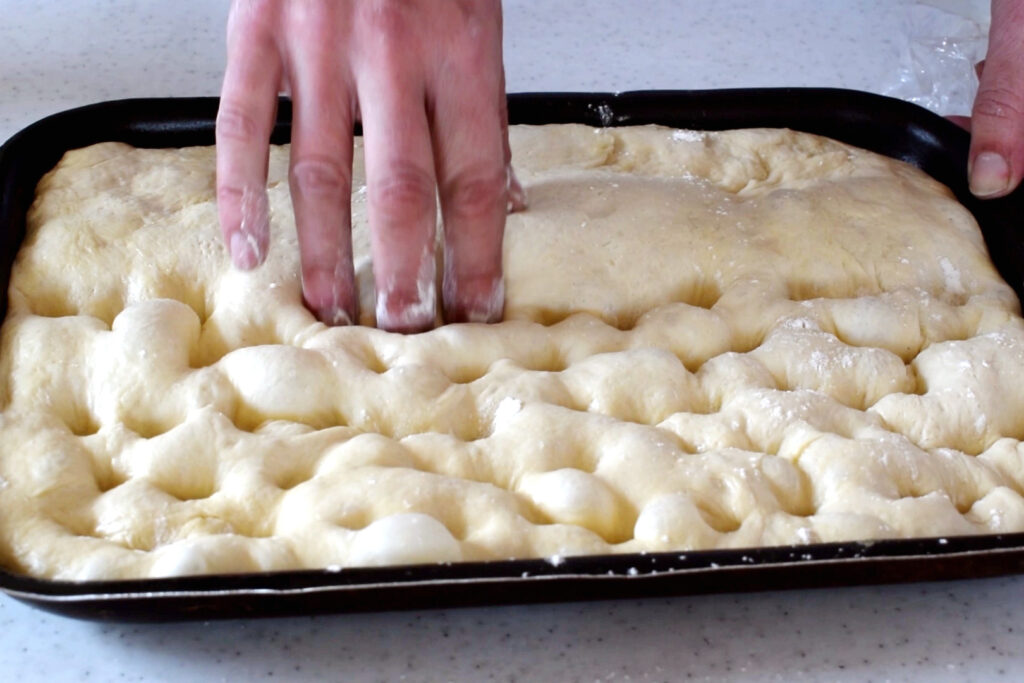
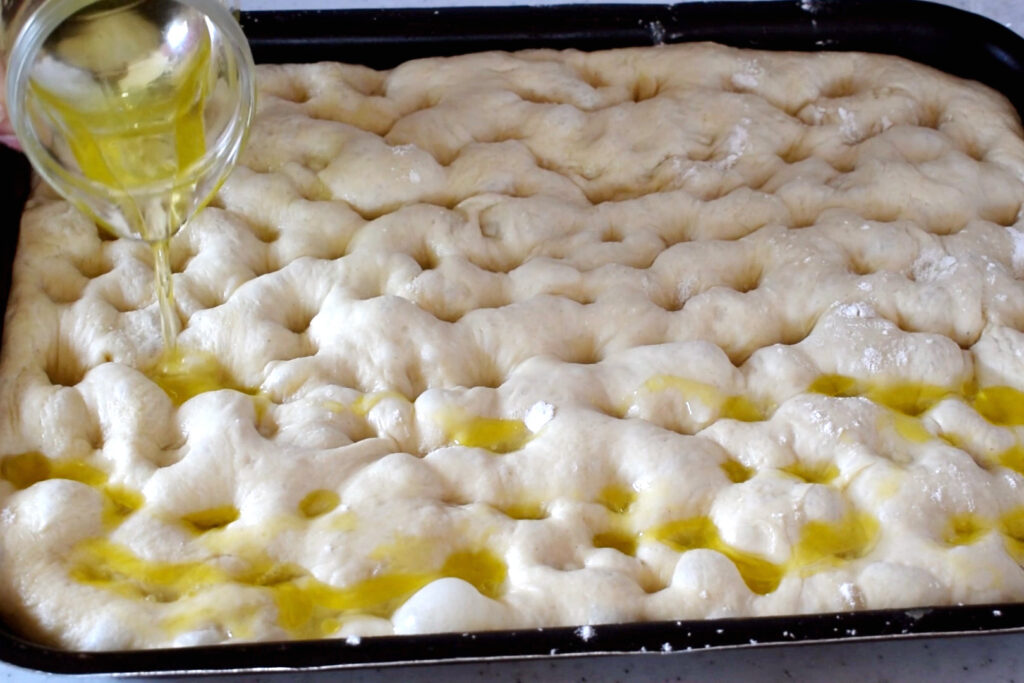
Dust the dough surface with Manitoba flour and your hands. Use 3 fingers: index, middle and ring stretched out and start pressing decisively and vigorously from the edge of the pan and then gradually move forward towards your stomach (9). Once all the holes are made, check for any bulges, re-press only where necessary. Pour the emulsion over the surface of your Genoese focaccia, each hole must be full of brine (10). At this point let the focaccia rise one last time in the turned off oven at room temperature for about 1 hour and until the brine has halved, because it has been absorbed.
6. Bake your Focaccia!
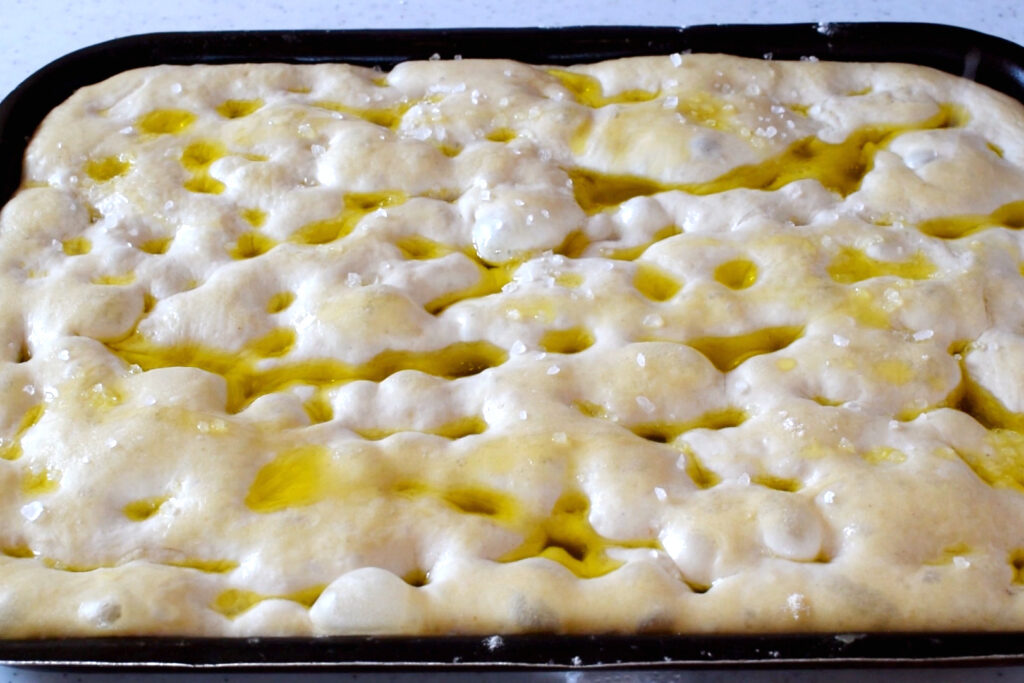
Now preheat the oven to 250°C (482 °F). Add another thread of oil and a sprinkling of coarse salt (11). Bake in the lower part in contact with the very hot oven, and leave to bake without opening for about 12 minutes. Then transfer the focaccia to the upper shelf, where it must bake for about 10 minutes. Final brush of oil, turn on the grill and leave for a few more minutes.
Pro tip: Each oven is different, so I tell you right away a trick not to go wrong with cooking: you can move the focaccia to the upper shelf when you see that, lifting the dough, it has become slightly golden on the bottom! Remember! If you do not check, you risk finding a soft bottom.
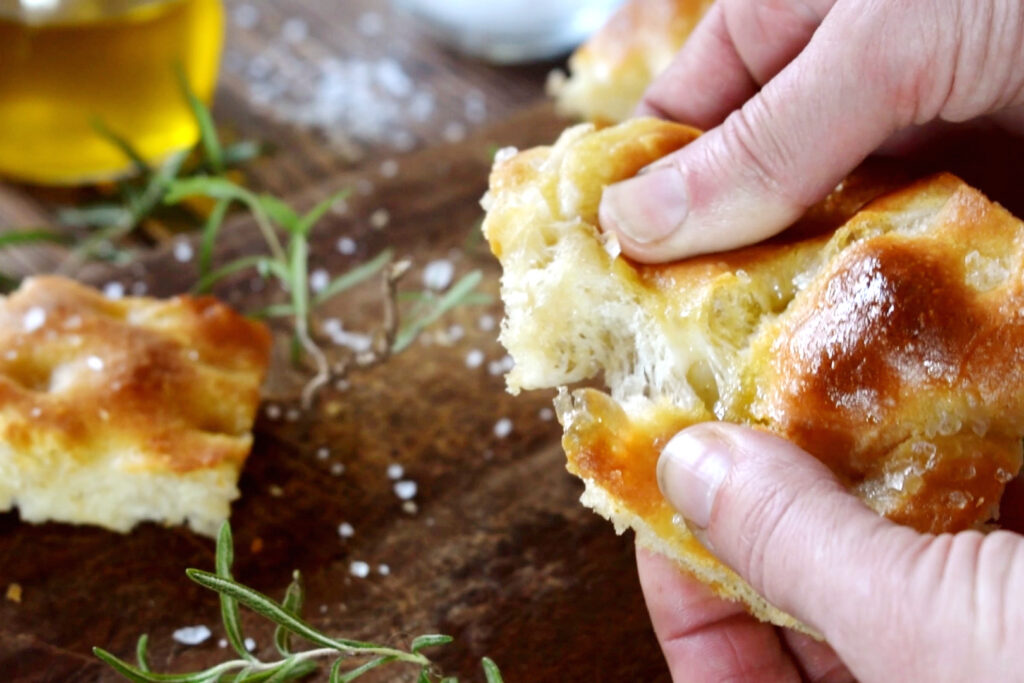
Here is the ready Genoese focaccia! Oily, fragrant, soft! Serve after 10 minutes or let it cool completely and serve at room temperature, either way it will be delicious!
Tips for Perfect Focaccia
For that signature golden crust, brush the surface with olive oil before baking. To achieve the authentic Genoese taste, be generous with the salamoia – it’s what gives the focaccia its distinctive flavor and texture. Remember, patience is key; allowing proper rising time between steps ensures a light, airy result that’s worth the wait.
Storing and Reheating Leftover Genoese Flatbread
Proper Storage Techniques
To keep your Genoese focaccia fresh and delicious for days, proper storage is key. Once your flatbread has cooled completely (about an hour after baking), wrap it tightly in plastic wrap or place it in an airtight container. This method helps preserve its moisture and prevents it from drying out. For best results, store at room temperature for up to 2–3 days.
If you need to keep it longer, you can freeze your focaccia. Wrap individual portions in plastic wrap, then place them in a freezer-safe bag. Properly stored, it can last up to 3 months in the freezer.
Reheating for Optimal Flavor
When you’re ready to enjoy your stored focaccia, reheating can restore its original texture and flavor. For room temperature focaccia, preheat your oven to 175 °C (350 °F). Sprinkle a few drops of water on top of the bread, then wrap it loosely in aluminum foil. Heat for about 5–7 minutes until warm and slightly crispy.
For frozen focaccia, thaw it at room temperature for about an hour before reheating. Then, follow the same process as above, but increase the heating time to 10–12 minutes.
Pro tip: Avoid using the microwave, as it can make your focaccia soggy and unevenly heated. The oven method ensures you’ll get that perfect balance of crispy exterior and soft interior that makes Genoese focaccia so irresistible.
Frequently Asked Questions About Genoese Focaccia Flatbread
What’s the difference between focaccia and pizza?
While both are Italian flatbreads, focaccia is typically thicker and spongier than pizza. Focaccia is often flavored with olive oil and herbs, while pizza is usually topped with sauce and cheese. Focaccia is also commonly eaten as is or used for sandwiches, whereas pizza is typically a main dish.
Can I make focaccia without yeast?
While traditional focaccia recipes call for yeast, you can make a yeast-free version using baking powder or baking soda. However, keep in mind that the texture and flavor will be different from the classic yeast-leavened focaccia. The yeast contributes to the bread’s characteristic airy texture and complex flavor profile.
What are some common toppings for focaccia?
Focaccia is incredibly versatile when it comes to toppings. Some popular options include:
- Rosemary and sea salt
- Cherry tomatoes and olives
- Caramelized onions
- Roasted garlic
- Thinly sliced potatoes
- Cheese (like Parmesan or mozzarella)
Feel free to get creative and experiment with your favorite herbs, vegetables, or even fruits!

Mastering the Art of Authentic Genoese Focaccia Flatbread: Tips and Tricks (VIDEO)
Equipment
- 1 40×30 cm baking sheet (about 16×12 inches)
Ingredients
For the dough:
- 350 g Manitoba flour or bread flour 2¾ cups plus 2 tbsp
- 150 g flour 0 1¼ cups
- 1 tbsp fresh brewer’s yeast or 1 generous teaspoon of dry brewer’s yeast
- 300 ml water at room temperature (1¼ cups)
- 1 teaspoon honey
- 30 g extra virgin olive oil 2 tbsp
- 10 g salt 2 tsp
For the brine:
- 120 ml water ½ cup
- 2 tablespoons extra virgin olive oil
- 2 generous pinches of salt
For topping:
- Extra virgin olive oil
- 1 tablespoon of coarse salt
Instructions
Prepare the starter (Biga).
- In a large bowl, mix the two flours and sift them.
- In a smaller bowl, add 100 g of flour taken from the sifted flour mixture, and the yeast dissolved in 60 ml of water taken from the total.
- Knead by hand, form a ball and make an incision of a cross. Cover with plastic wrap and let rise at 26 °C (78 °F) for about 1–2 hours, until the starter has doubled in volume. To reach about 26° C you can put the dough in the oven turned off, closing the door.
Prepare the dough.
- In the large bowl with the flours, add the starter, 240 ml of water and a teaspoon of honey.
- Knead until all the ingredients are incorporated, it will only take a few minutes.
- Put the dough on a lightly floured work surface. Then add 30 g of oil, a little at a time, and knead. It will take 5 minutes, and you will see the dough of the Genoese focaccia become elastic and detach from the walls. Finally, add the salt and knead well.
- Form a ball and put it back in the bowl. Cover with plastic wrap and let rise for at least 3 hours at 26 °C (78 °F). The dough must triple in volume. In winter, it will take 4 hours, in summer 2–3 hours will be enough.
Prepare the salamoia (brine).
- In a pitcher put the water, salt and oil. Stir well until the salt dissolves.
Prepare the Genoese focaccia in a baking sheet.
- Turn the risen dough onto a lightly floured work surface, form a ball, and let it rest for 10 minutes.
- Roll out the dough, dusted lightly with Manitoba flour. Transfer the rolled out dough to an oiled baking pan. Cover with plastic wrap and let rise for about 40 minutes.
- At the end of the indicated time, stretch the Genoese focaccia edges until they reach the edges of the pan. Cover with plastic wrap and let rise for 1 hour. At the end of the time, the focaccia dough will have taken on a puffy and rested appearance. It’s time to make the holes!
- Dust the dough surface with Manitoba flour and your hands. Use 3 fingers: index, middle and ring stretched out and start pressing decisively and vigorously from the edge of the pan and then gradually move forward towards your stomach.
- Once all the holes are made, check for any bulges, re-press only where necessary. Pour the emulsion over the surface of your Genoese focaccia, each hole must be full of brine. At this point, let the focaccia rise one last time in the turned off oven at room temperature for about 1 hour and until the brine has halved, because it has been absorbed.
- Preheat the oven to 250 °C (482 °F).
- Add another thread of oil and a sprinkling of coarse salt.
- Bake in the lower part in contact with the very hot oven, and leave to bake without opening for about 12 minutes. Then transfer the focaccia to the upper shelf, where it must bake for about 10 minutes. Final brush of oil, turn on the grill and leave for a few more minutes.
- Pro tip: Each oven is different, so I tell you right away a trick not to go wrong with cooking: you can move the focaccia to the upper shelf when you see that, lifting the dough, it has become slightly golden on the bottom! Remember! If you do not check, you risk finding a soft bottom.
- Here is the ready Genoese focaccia! Oily, fragrant, soft! Serve after 10 minutes or let it cool completely and serve at room temperature, either way it will be delicious!