Learn how to make your own chestnut flour at home with just a few basic ingredients. This step-by-step guide will teach you how to roast, peel, mill, and sift chestnuts into a nutritious, gluten-free flour perfect for baking.
Have you ever come across an intriguing recipe that calls for chestnut flour, only to find that it’s impossible to track down? Don’t worry, you’ve got this. Making your own chestnut flour at home is easier than you might think. All you need are some fresh chestnuts and a little bit of patience. In just a few simple steps, you’ll have homemade chestnut flour to use in all your favorite recipes.
Why Make Your Chestnut Flour?
There are a few good reasons to make flour with chestnut. First, it can be difficult to find in stores and expensive to buy online. By making your own, you’ll have an affordable supply on hand whenever you need it for recipes.
Second, homemade chestnut flour will be fresher than anything you can buy, and freshness matters with chestnut flour. The natural oils in chestnuts can go rancid over time, giving the flour a bitter taste. When you make it yourself, you know exactly how fresh it is.
Finally, you’ll have the satisfaction of creating an artisanal ingredient from scratch. If you’ve gone to the trouble of foraging or purchasing fresh chestnuts, why not see the process through to the end and mill them into flour yourself? The entire process, from peeling and roasting the chestnuts to grinding and sifting the flour, can be a fun, rewarding experience for any home cook.
With just a few tools and some time, you can make chestnut flour that’s fresher, more affordable, and more satisfying than anything from a store. Give it a try — your homemade pasta, cakes, and other chestnut flour creations will be worth the effort! By making your own chestnut flour, you’ll open up a whole new world of cooking possibilities that highlight this sweet, earthy ingredient.
How to Make Flour with Chestnut
To make your own chestnut flour at home, follow these simple steps:
1. Gathering the Chestnuts
First, you’ll need to get your hands on some fresh chestnuts. Look for chestnuts that feel heavy for their size and have no holes or damage to the outer shell. 1 kg (about 2 pounds) of chestnuts in the shell will yield roughly 1/2 kg of chestnut flour (about 1 pound).
2. Roasting and Peeling
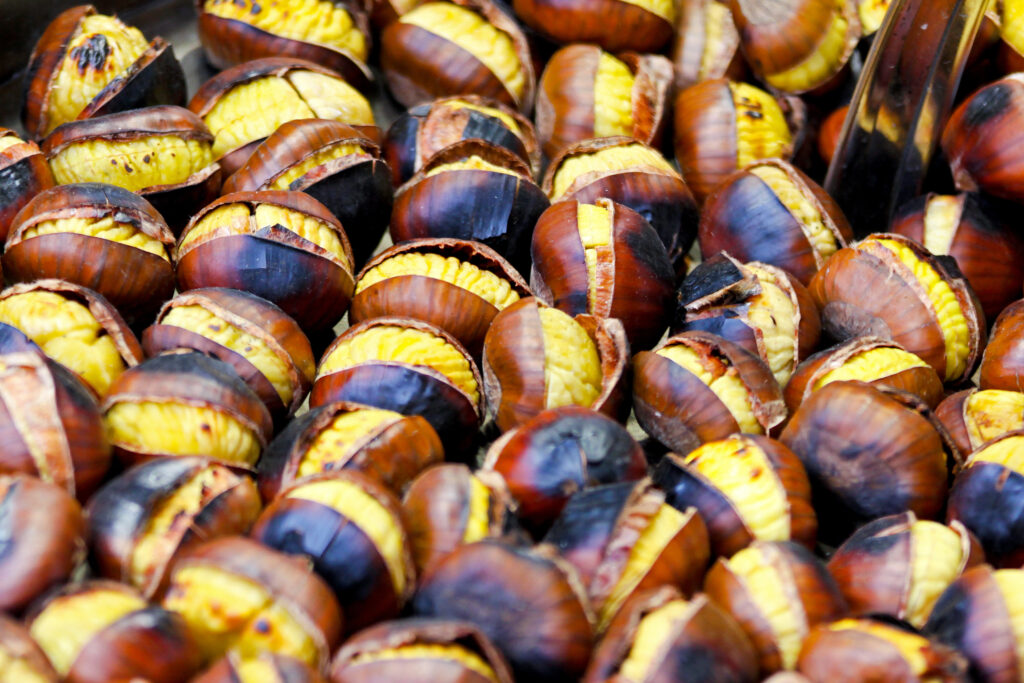
Preheat your oven to 200 °C (about 400 °F). Use a knife to cut an X shape into the rounded side of each chestnut. Place them on a baking sheet and roast for about 30 minutes, until the shells open. Let cool, then peel off the shells and papery brown skins.

3. Drying the Chestnuts
Next, you need to dry the chestnuts. Spread them on a wire rack set over a baking sheet and leave in a warm, airy spot away from direct sunlight for about a week until completely dried out. The chestnuts are ready when they’re shriveled and hard.
4. Grinding into Flour
Finally, use a high-powered blender, food processor, or coffee grinder to grind the dried chestnuts into a fine powder. Sieve the powder to make an even finer, flour-like consistency. Store your homemade flour of chestnut in an airtight container — it will keep for several months. You can use it in place of regular flour for cakes, breads, and other recipes.
Tips for Using Homemade Chestnut Flour in Recipes
Homemade chestnut flour can add richness and nutty flavor to many recipes. Here are some tips for using it:
Measure Carefully
Since chestnut flour is gluten-free, it can be denser than regular flour. Use about 3/4 the amount of chestnut flour as wheat flour in recipes. You may need to adjust the amounts of other wet ingredients like eggs or oil. Start with less and add gradually until you reach the desired consistency.
Mix With Other Flours
For lighter results, blend chestnut flour with other gluten-free flours like rice, tapioca or coconut flour. A blend of 1/2 chestnut flour and 1/2 rice flour works well in many recipes. You can also use this gluten-free flour for only part of the total flour called for, mixing it with wheat flour.
Add Baking Powder
Chestnut flour has little natural rising ability on its own. Add about 1 1/2 teaspoons of baking powder per cup of this flour to help recipes rise. You may need to increase baking powder for recipes calling for more flour.
Use in Batters
Chestnut flour works great in batter-based recipes like pancakes, waffles, muffins, quick breads or this delicious Ricotta Necci. Its dense, creamy texture gives body to batters, and its nutty flavor comes through well. Reduce other flour amounts and add leavening as noted above.
Good for Sweets
The natural sweetness of chestnut flour pairs nicely with treats like cakes, cookies, crêpes and tarts. Use part of this flour and part wheat or rice flour for the best results. Chestnut flour also enhances the flavor of chocolate desserts.
Conclusion
So there you have it, a step-by-step guide to making your own chestnut flour at home. While it does take some time and effort, the end result is entirely worth it. Homemade chestnut flour is fresher, healthier, and more flavorful than anything you can buy. You’ll be amazed at the rich, nutty aroma and how versatile the flour is in all kinds of recipes. The next time a recipe calls for chestnut flour, you’ll feel confident making your own. And who knows, you may even find yourself making extra just so you can experiment by adding it to other foods. Happy cooking and Buon Appetito! Let me know if you have any other questions.


