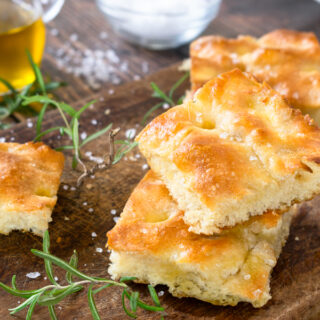
Mastering the Art of Authentic Genoese Focaccia Flatbread: Tips and Tricks (VIDEO)
Learn how to make authentic Genoese Focaccia Flatbread with a crackly crust, fluffy interior, and olive oil-herb flavor straight from Italy.
Equipment
- 1 40×30 cm baking sheet (about 16x12 inches)
Ingredients
For the dough:
- 350 g Manitoba flour or bread flour 2¾ cups plus 2 tbsp
- 150 g flour 0 1¼ cups
- 1 tbsp fresh brewer's yeast or 1 generous teaspoon of dry brewer's yeast
- 300 ml water at room temperature (1¼ cups)
- 1 teaspoon honey
- 30 g extra virgin olive oil 2 tbsp
- 10 g salt 2 tsp
For the brine:
- 120 ml water ½ cup
- 2 tablespoons extra virgin olive oil
- 2 generous pinches of salt
For topping:
- Extra virgin olive oil
- 1 tablespoon of coarse salt
Instructions
Prepare the starter (Biga).
- In a large bowl, mix the two flours and sift them.
- In a smaller bowl, add 100 g of flour taken from the sifted flour mixture, and the yeast dissolved in 60 ml of water taken from the total.
- Knead by hand, form a ball and make an incision of a cross. Cover with plastic wrap and let rise at 26 °C (78 °F) for about 1–2 hours, until the starter has doubled in volume. To reach about 26° C you can put the dough in the oven turned off, closing the door.
Prepare the dough.
- In the large bowl with the flours, add the starter, 240 ml of water and a teaspoon of honey.
- Knead until all the ingredients are incorporated, it will only take a few minutes.
- Put the dough on a lightly floured work surface. Then add 30 g of oil, a little at a time, and knead. It will take 5 minutes, and you will see the dough of the Genoese focaccia become elastic and detach from the walls. Finally, add the salt and knead well.
- Form a ball and put it back in the bowl. Cover with plastic wrap and let rise for at least 3 hours at 26 °C (78 °F). The dough must triple in volume. In winter, it will take 4 hours, in summer 2–3 hours will be enough.
Prepare the salamoia (brine).
- In a pitcher put the water, salt and oil. Stir well until the salt dissolves.
Prepare the Genoese focaccia in a baking sheet.
- Turn the risen dough onto a lightly floured work surface, form a ball, and let it rest for 10 minutes.
- Roll out the dough, dusted lightly with Manitoba flour. Transfer the rolled out dough to an oiled baking pan. Cover with plastic wrap and let rise for about 40 minutes.
- At the end of the indicated time, stretch the Genoese focaccia edges until they reach the edges of the pan. Cover with plastic wrap and let rise for 1 hour. At the end of the time, the focaccia dough will have taken on a puffy and rested appearance. It’s time to make the holes!
- Dust the dough surface with Manitoba flour and your hands. Use 3 fingers: index, middle and ring stretched out and start pressing decisively and vigorously from the edge of the pan and then gradually move forward towards your stomach.
- Once all the holes are made, check for any bulges, re-press only where necessary. Pour the emulsion over the surface of your Genoese focaccia, each hole must be full of brine. At this point, let the focaccia rise one last time in the turned off oven at room temperature for about 1 hour and until the brine has halved, because it has been absorbed.
- Preheat the oven to 250 °C (482 °F).
- Add another thread of oil and a sprinkling of coarse salt.
- Bake in the lower part in contact with the very hot oven, and leave to bake without opening for about 12 minutes. Then transfer the focaccia to the upper shelf, where it must bake for about 10 minutes. Final brush of oil, turn on the grill and leave for a few more minutes.
- Pro tip: Each oven is different, so I tell you right away a trick not to go wrong with cooking: you can move the focaccia to the upper shelf when you see that, lifting the dough, it has become slightly golden on the bottom! Remember! If you do not check, you risk finding a soft bottom.
- Here is the ready Genoese focaccia! Oily, fragrant, soft! Serve after 10 minutes or let it cool completely and serve at room temperature, either way it will be delicious!